Introduction
Welcome to another blog post about the great new feature additions of the latest and greatest Easy!Appointments 1.5 version. Blocked periods is a handy function that blocks availability for multiple days. You will find it very easy to use, but it will also save you tons of time while managing the unavailable seasons of your organization schedule. This article describes how to use Blocked Periods in Easy!Appointments.
What Are Blocked Periods?
Blocked Periods are entries that allow you to set aside specific times in your calendar when no appointments can be booked. Whether you need to block off time for a team meeting, personal errands, or planned maintenance, this feature ensures your availability reflects real-life commitments.
By marking periods as unavailable, you can avoid double-bookings and ensure your clients only see time slots that truly work for you.
Key Benefits
- Simple Implementation: Setting up blocked periods is as easy as creating an appointment. With just a few clicks, you’ll have full control over your schedule.
- Flexible Scheduling: Quickly set up blocked periods for one-time events. You can easily adapt your calendar to your evolving needs.
- Better Organization: Gain clarity on your available hours and ensure smoother coordination between your team and clients.
- Improved Client Experience: Prevent clients from booking during times when you’re unavailable.
A Blocked Period Example
Let’s say, that there is very low business during Christmas and you decide to close for a couple of days. Normally, you would need to update all the provider plans and define the unavailable time (either with unavailability blocks or with working plan exceptions). With the Blocked Periods though, you only need to define a single entry and the affected dates will automatically become available. Follow these steps in order to add your own blocked period.
- Log in to Easy!Appointments with an admin account
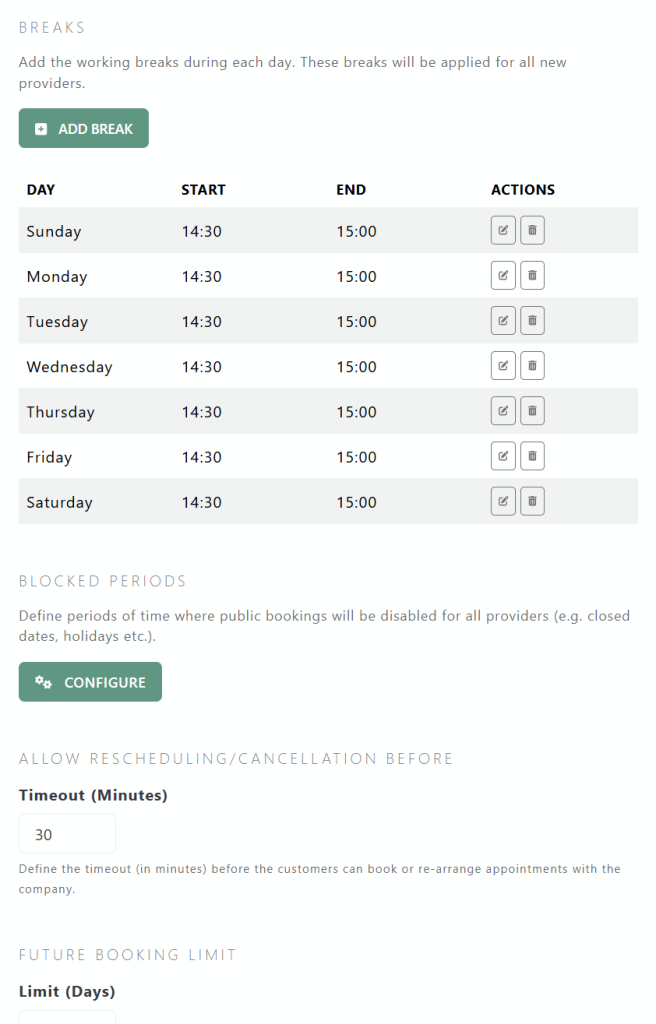
- Head to Settings and then Business Logic
- Find and click the Blocked Periods button
- Add a new Blocked Period entry and save
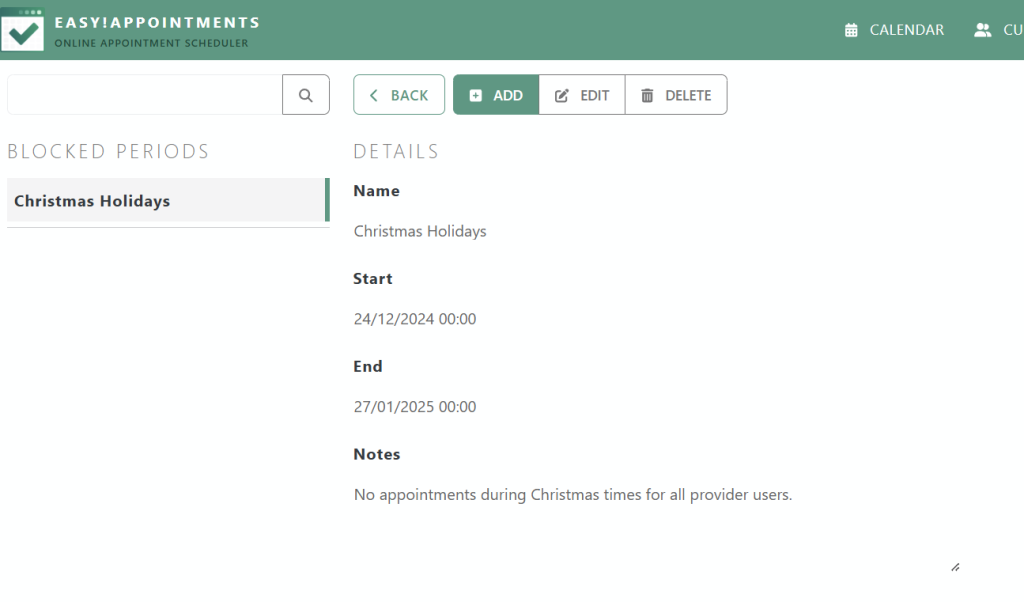
That’s it! The new entries will be shown in the calendar, and the online booking page will not offer any slots for the affected dates.
Going Premium
Did you read this article, but you’re still not sure on how to proceed?
Reach out to info@easyappointments.org and have an expert take care of everything for you in zero time.
Get your free quote and get started now!