In this post, we’ll explore how to make the most of appointment status options—like “Pending,” “Confirmed,” and “Completed”—to improve your workflow and enhance communication with your clients. Whether you’re new to Easy!Appointments or looking to optimize your scheduling process, this guide will help you unlock the full potential of this essential feature. Let’s dive in!
Using the Appointment Status Field
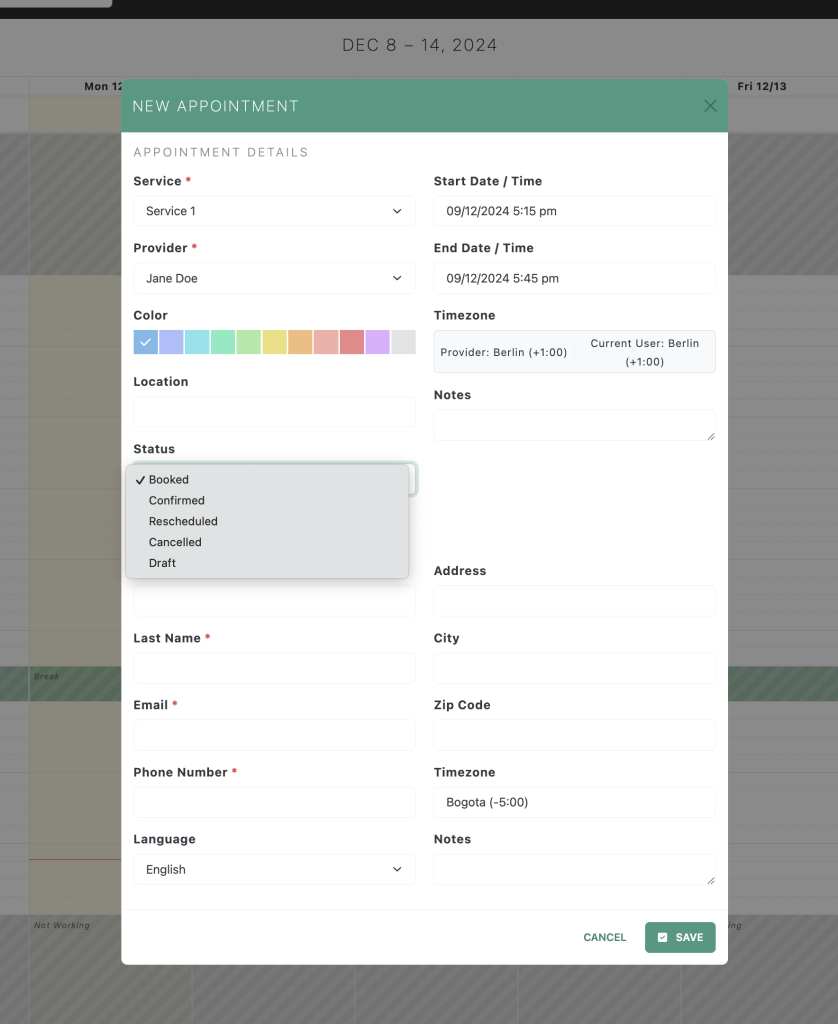
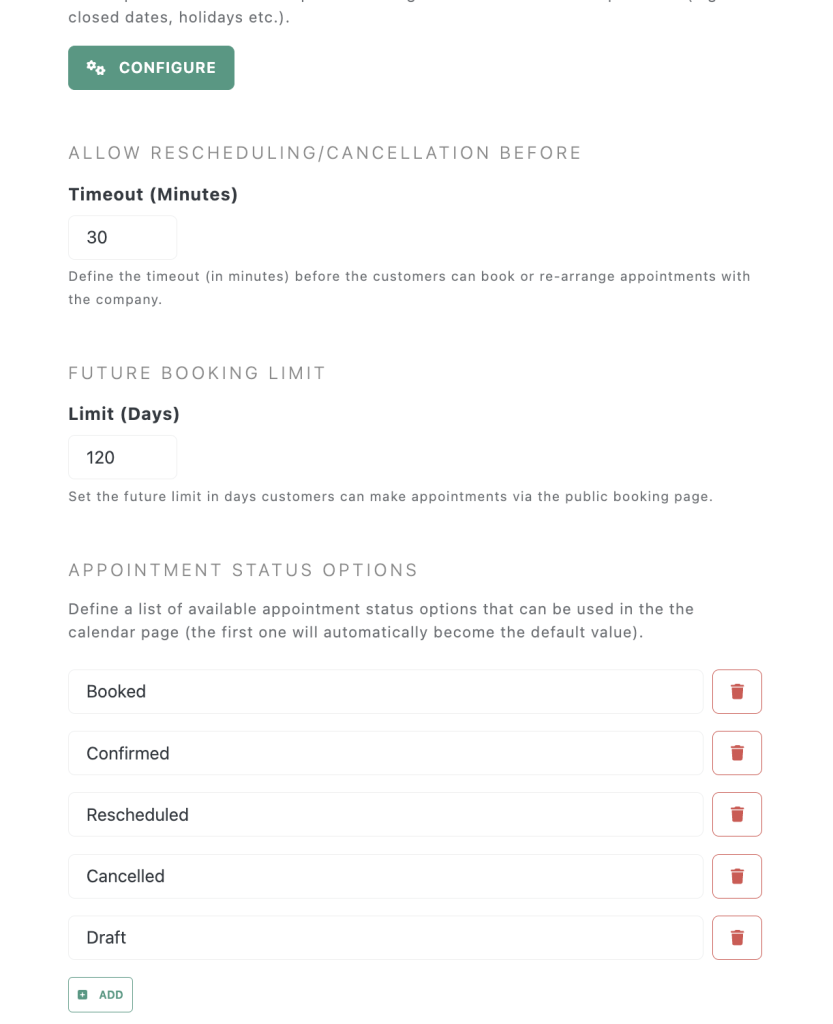
Ever since the latest Easy!Appointments 1.5 release, you can define your own appointment status options or use the default ones for your appointments. This simple, yet powerful feature will enable you to configure your own booking workflow. Using the appointment status field to set a value will provide semantics to the various possible appointment states.

You can easily configure the available appointment status options in the Business Logic settings page. The first status option is always the default one for any new appointments, but you can add as many options as you need.

Booking Workflow in Easy!Appointments
Managing appointments effectively involves transitioning through various stages in the booking workflow. Here’s how appointments typically move between the Booked, Confirmed, and Completed statuses in Easy!Appointments:
Booked
This is the initial stage when an appointment is created.
- Who triggers it?
- The customer books the appointment online or the service provider adds it manually.
- What happens?
- The system captures key details such as the service, date, time, and customer information.
- The appointment is tagged as “Booked,” indicating that it’s reserved but not yet finalized.
- Notifications:
- Both the customer and the service provider may receive automated notifications or reminders.
Confirmed
The “Booked” status progresses to “Confirmed” once the appointment is reviewd.
- Who triggers it?
- The service provider reviews the appointment and confirms it manually.
- What happens?
- The status change communicates to the customer that their appointment is approved and ready to proceed.
- Any rescheduling or preparation is handled at this stage.
- Notifications:
- Customers typically receive a confirmation message via email, reducing no-shows and misunderstandings.
Completed
Once the service is delivered, the appointment status changes to “Completed.”
- Who triggers it?
- The service provider marks the appointment as completed in the system.
- What happens?
- This status indicates that the appointment has concluded successfully.
- Follow-Up:
- Automated thank-you messages or feedback requests may be sent to the customer.
Benefits of This Workflow
- Clarity: Both customers and service providers can easily track the appointment’s progress.
- Efficiency: Automated notifications reduce administrative tasks and improve communication.
- Accountability: A clear workflow ensures every appointment is accounted for, from booking to completion.
This structured approach enhances customer satisfaction and streamlines operations, making Easy!Appointments a valuable tool for businesses of any size. Make sure to give appointment status a try and configure your own booking workflow.
Going Premium
Did you read this article, but you’re still not sure on how to proceed?
Reach out to info@easyappointments.org and have an expert take care of everything for you in zero time.
Get your free quote and get started now!


