Continuing the endless new features of the latest and greatest 1.5 release, in this blog post, you will learn how to SSO with LDAP / Active Directory. Single Sign On (SSO) is a very useful feature, especially for corporate environments, and will allow the Easy!Appointments users to sign in using a single pair of credentials for all the connected apps.
What is LDAP?
LDAP (Lightweight Directory Access Protocol) is an open, industry-standard application protocol used for accessing and managing distributed directory services over a network. It allows applications and services to query and modify entries in a directory service, which typically contains structured information about users, devices, groups, and other entities in an organization.
What is Active Directory?
Active Directory (AD) is a directory service developed by Microsoft for Windows domain networks. It is primarily used for managing networked resources and services, including users, computers, and permissions, within a Windows environment. Active Directory allows administrators to organize and control the access to resources in an organization.
Getting the Configuration Right
Firstly, you will find the LDAP configuration in the Integrations section, under the Settings menu. In this page, you can define the connection information of your LDAP server and establish a connection with Easy!Appointments.
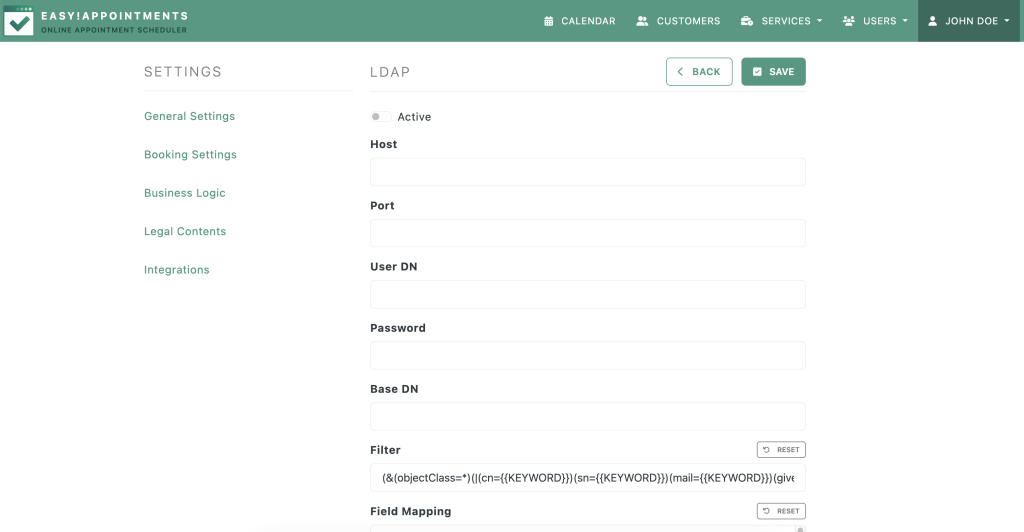
Moreover, once the connection is established, you can start searching and importing user accounts into Easy!Appointments, while assigning them a user role. These users will now be present in the app and can log in with their LDAP credentials.
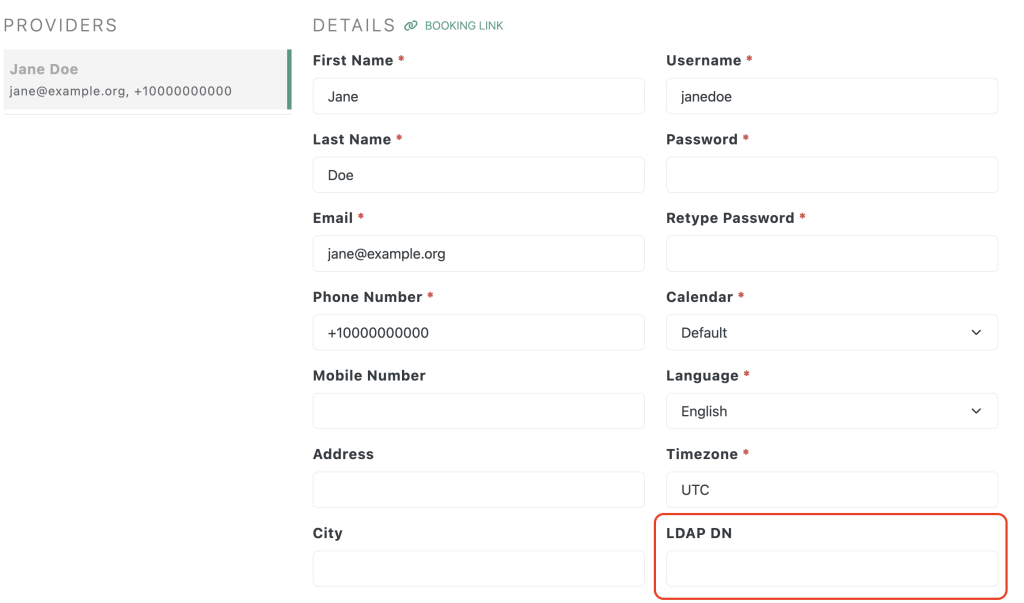
Alternatively, you can modify existing users and assign them the LDAP DN value, so that Easy!Appointments can find them during the login process.
Try the Login Page
After the connection is completed and the users are imported/matched, you will be able to use the login page with the LDAP credentials. The important part is that the username is matching the Easy!Appointments user, something that happens automatically if the user was imported through the LDAP configuration page.
Going Premium
Did you read this article, but you’re still not sure on how to proceed?
Reach out to info@easyappointments.org and have an expert take care of everything for you in zero time.
Get your free quote and get started now!