Recently the latest and greatest 1.5 release became available for download, featuring tons of new functionality and improvements. One of the most anticipated feature was the ability to synchronize the Easy!Appointments data with any external system that supports the CalDAV communication protocol, in a bi-directional way. This is now possible and opens a new door to countless integration possibilities. This blog post will show you how to start syncing appointments with CalDAV.
What Is CalDAV?
CalDAV (Calendaring Extensions to WebDAV) is an Internet standard allowing a client to access scheduling information on a remote server. It enables the management and sharing of calendar data and scheduling information over the Web. Here are some key points about CalDAV:
- Standard Protocol: CalDAV is a standard protocol defined by the Internet Engineering Task Force (IETF) and is described in RFC 4791. It builds on WebDAV (Web Distributed Authoring and Versioning), which itself is an extension of HTTP that allows clients to perform remote web content authoring operations.
- Calendar Data Management: It allows users to create, retrieve, update, and delete calendar events and tasks on a remote server. This enables seamless synchronization of calendar data across multiple devices and clients.
- Interoperability: CalDAV is designed to be interoperable between different calendar clients and servers. This means users can use different calendar applications (e.g., Apple Calendar, Mozilla Thunderbird with Lightning, Evolution) to access and manage their calendars hosted on a CalDAV-compliant server.
- Server and Client Examples: Common CalDAV servers include Apple Calendar Server, Google Calendar (though its CalDAV interface is somewhat limited), and DAViCal. Clients include Apple’s Calendar app on macOS and iOS, Thunderbird’s Lightning extension, and many other calendar applications that support the CalDAV protocol.
- Integration with Other Protocols: CalDAV can work alongside CardDAV (an address book client/server protocol) to provide a comprehensive personal information management system. Both protocols are based on WebDAV and extend it to handle calendar and contact data, respectively.
- Usage Scenarios: CalDAV is used in various scenarios including personal scheduling, enterprise calendar management, shared calendars for teams, and public event scheduling.
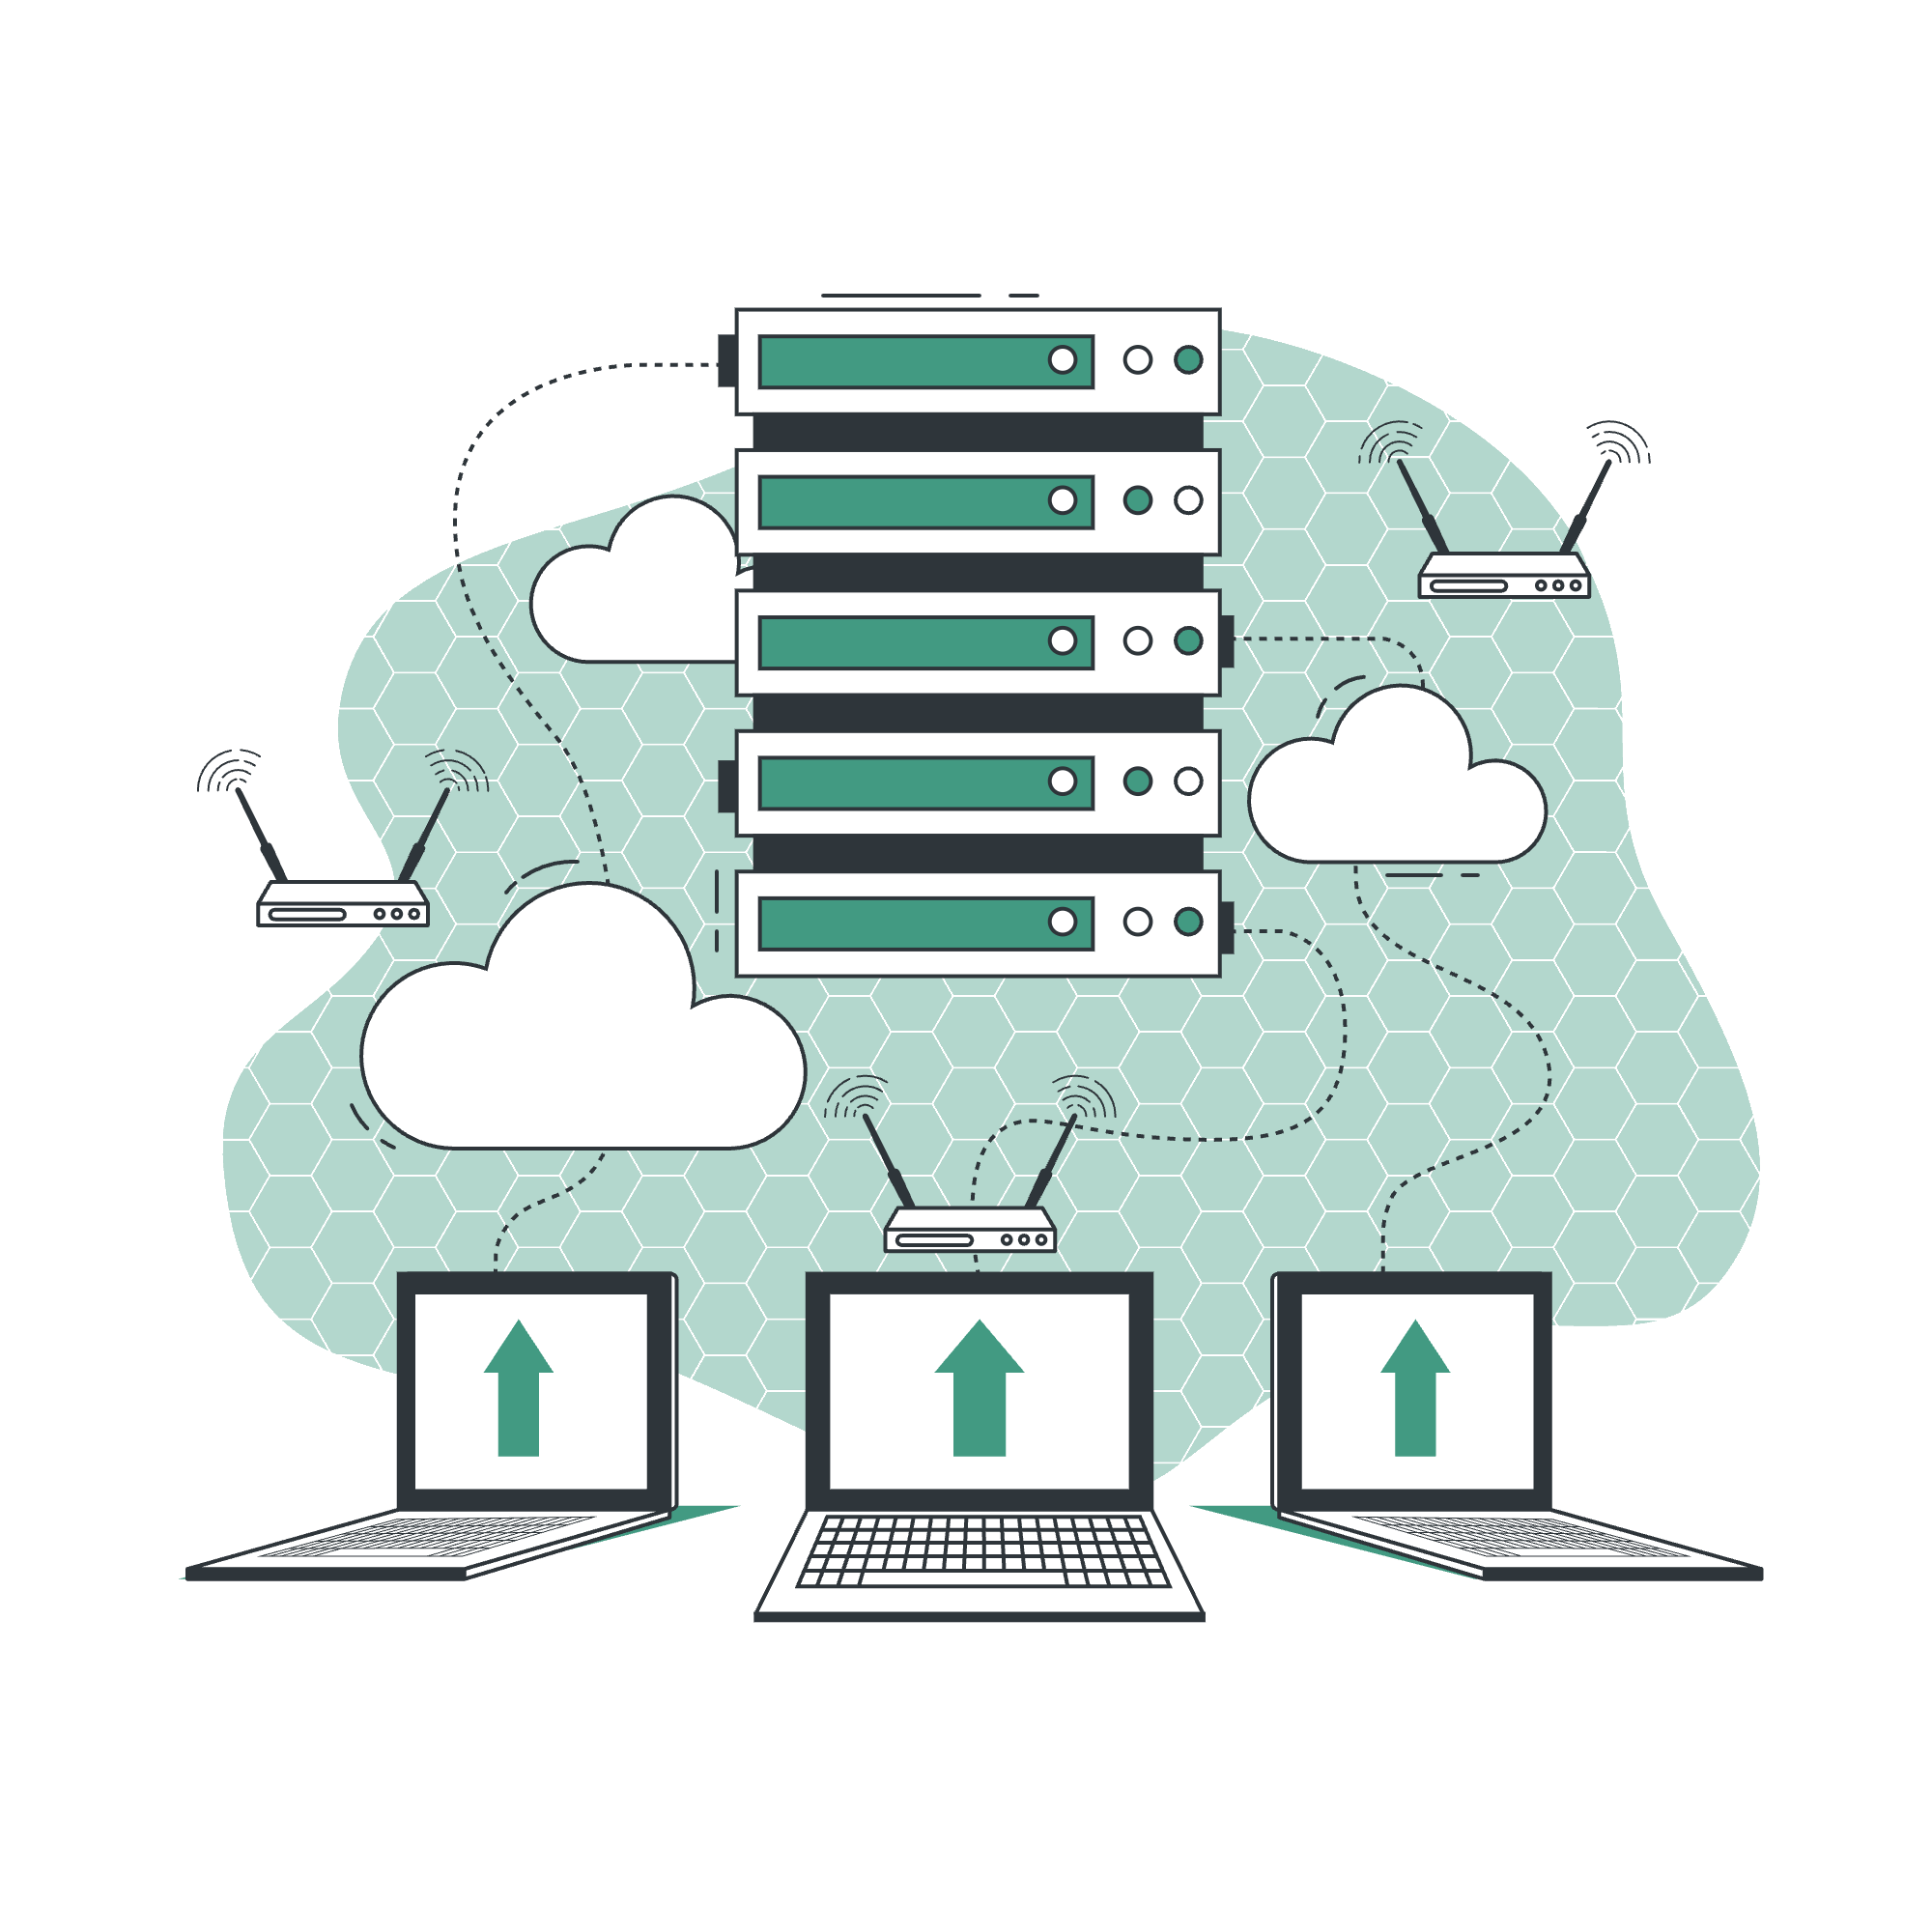
CalDAV helps in maintaining a synchronized and up-to-date calendar experience across different platforms and devices, promoting better time management and coordination.
How Can I Enable the CalDAV Sync?
Very easily, CalDAV does not require individual API configuration just like Google Calendar Sync does. You will just need to get access to your CalDAV calendar connection information and use those in order to connect a provider schedule to a remote server and activate syncing.
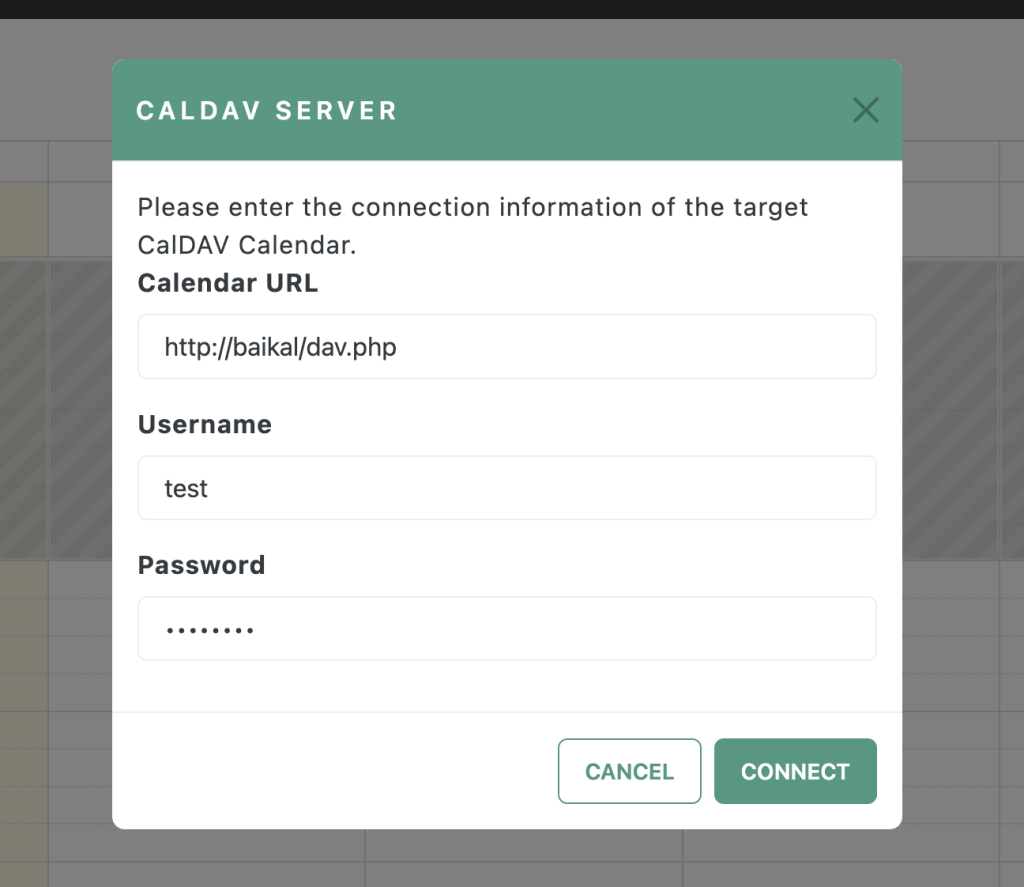
Head to the calendar page and select one of the provider users (if you are a provider user yourself then your user is preselected). Click on the “Enable Sync” button and optionally select “CalDAV” if requested. Finally enter your calendar URL, username and password and save. In order to automatically get your appointments synced, you should enable the sync cron job as described in this older blog post.
Case Study: Connect Easy!Appointments With Baikal
Baïkal is a lightweight server for managing calendars and contacts using CalDAV and CardDAV protocols. It allows users to sync their calendars and address books across multiple devices. Baïkal is compatible with iOS, Mac OS X, Android, and other platforms. It’s easy to install, requires only a PHP-capable server and can use MySQL or SQLite for data storage. Baïkal is open-source and free to use, with an administrative interface for user management.
You can easily self-host Baikal (just like with Easy!Appointments) and connect your calendars to your mobile phone or your local calendar application (e.g. Thunderbird). Events will seamlessly synchronize between all systems, allowing you to access them from any app or device supports CalDAV.
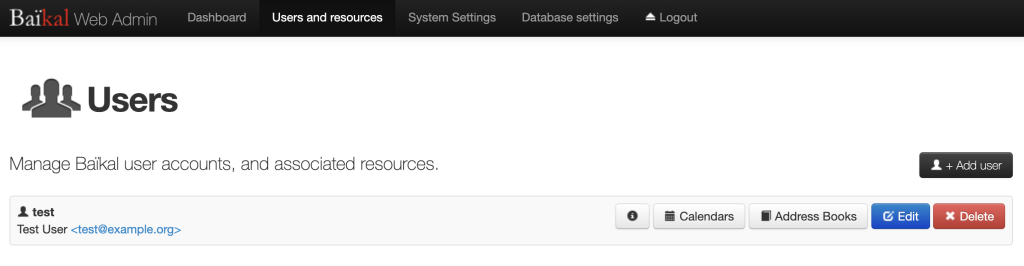
Create a New Baikal User and Calendar
Before enabling the synchronization we need to make sure that Baikal has a user and calendar we can connect with. This is very simple as the Baikal Admin interface will allow you create a new user right out of its home page.
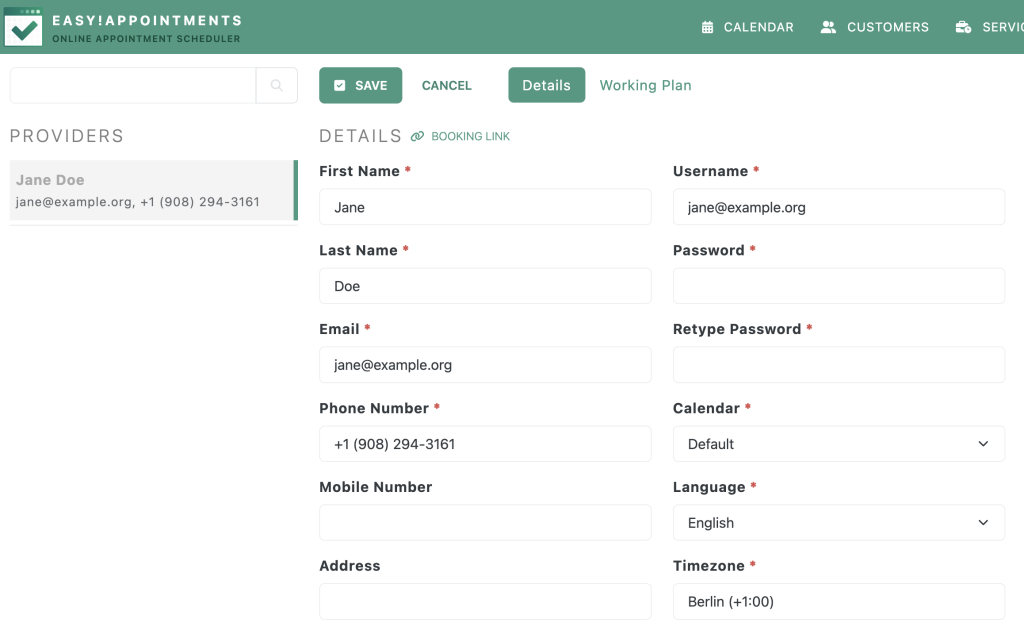
Create a New Easy!Appointments Provider
If you do not have one already, you can go ahead and create a new provider user, which will be the one that we will connect to the Baikal CalDAV server.
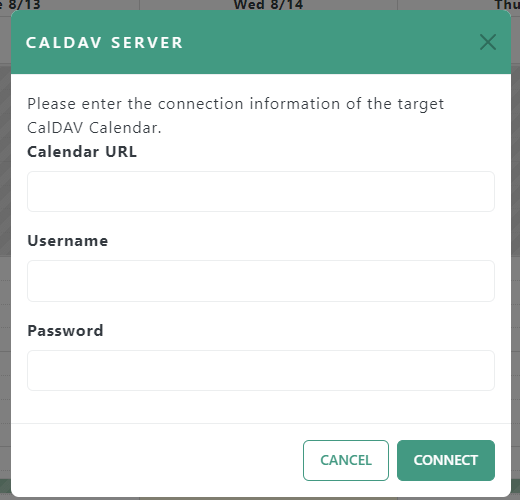
Enable the CalDAV Sync in Easy!Appointments
Select your new provider from the calendar page and click on the Enable Sync button, then CalDAV (if prompted) and finally set the Baikal user credentials.
That’s it! You can now start syncing your appointments with CalDAV!
Going Premium
Did you read this article, but you’re still not sure on how to proceed?
Reach out to info@easyappointments.org and have an expert take care of everything for you in zero time.
Get your free quote and get started now!