One of the main feature of Easy!Appointments is its ability to synchronize provider calendars with Google Calendar. The synchronization mechanism supports two-way syncing between Easy!Appointments and Google Calendar which means that scheduling changes will be applied in both calendars, no matter where they took place. Once the events are on Google Calendar they can then be synced and used by other services that support Google’s API.
Requirements
- Easy!Appointments installation
- Provider user record
- Google account
Google API Credentials
The Easy!Appointments syncing algorithm requires Google API credentials in order to work. You can generate those from the Google Cloud Platform while being signed in with your Google account.

After creating a new project on the Google Cloud Platform you will be able to see the main overview page (dashboard) that features plenty of information about your project and its API usage. Click on the “Go to APIs overview” button to redirect to the “APIs and Services” page.
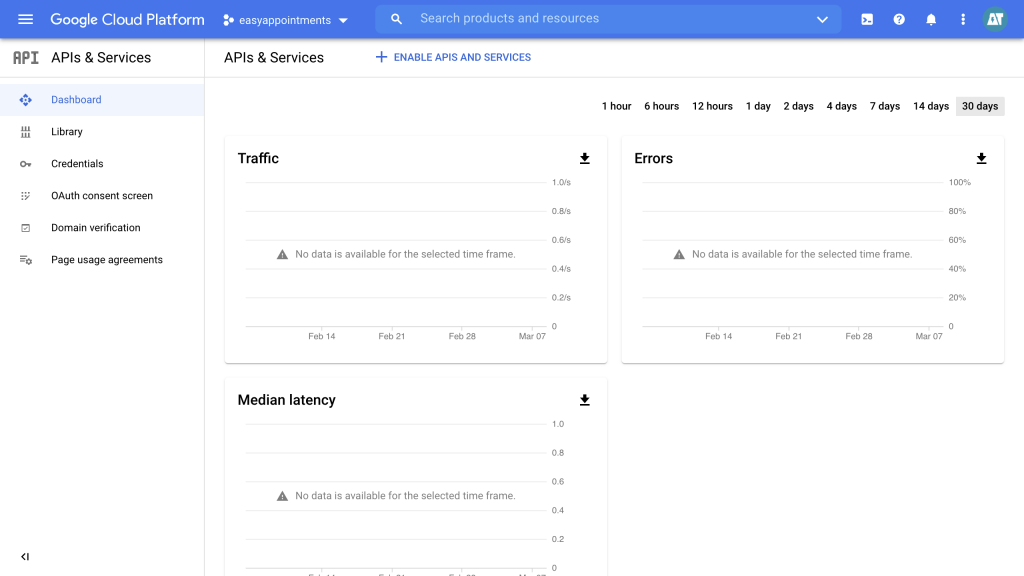
The first thing to do is to activate the Google Calendar API Service so that the integration becomes available once you connect your calendar. For this you will need to click the “Enable APIs And Services” button at the top, find Google Calendar in the displayed list and click on “Enable”. Afterwards you will need to create some credentials for your integration. You can do that by clicking the “Credentials” menu item on the left side of the page.
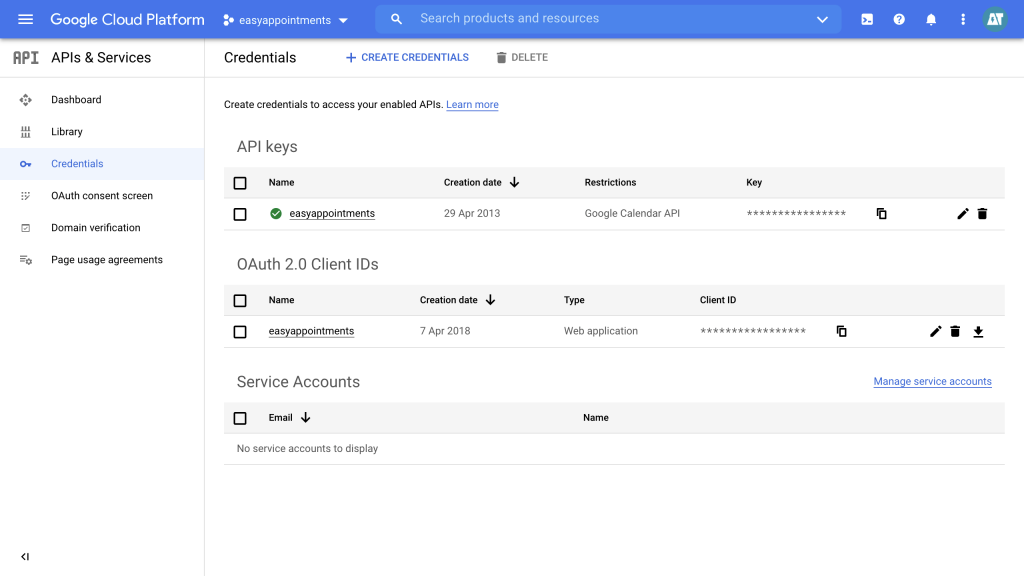
For the integration you will need two type of credentials, an API Key and an OAuth 2.0 Client. You will need to fill the consent screen information and then select Web Application in the next frame. Give it a client name and add your installation domain as the Authorised JavaScript origins (important give only the domain not the complete URL e.g. https://mywebsite.com).
The Authorized redirect URIs field will need the following value.
https://mywebsite.com/url/to/easyappointments/folder/index.php/google/oauth_callbackClick on Create button and Google Cloud will show you two credentials (Client ID and Secret) that you need to mark for the following step.
Customers will be able to sync their appointments with Google Calendars but beforehand you will need an API Key. Click again on the Create Credentials button while being in the Credentials overview page and select API Key.
Enter Your Credentials To Easy!Appointments
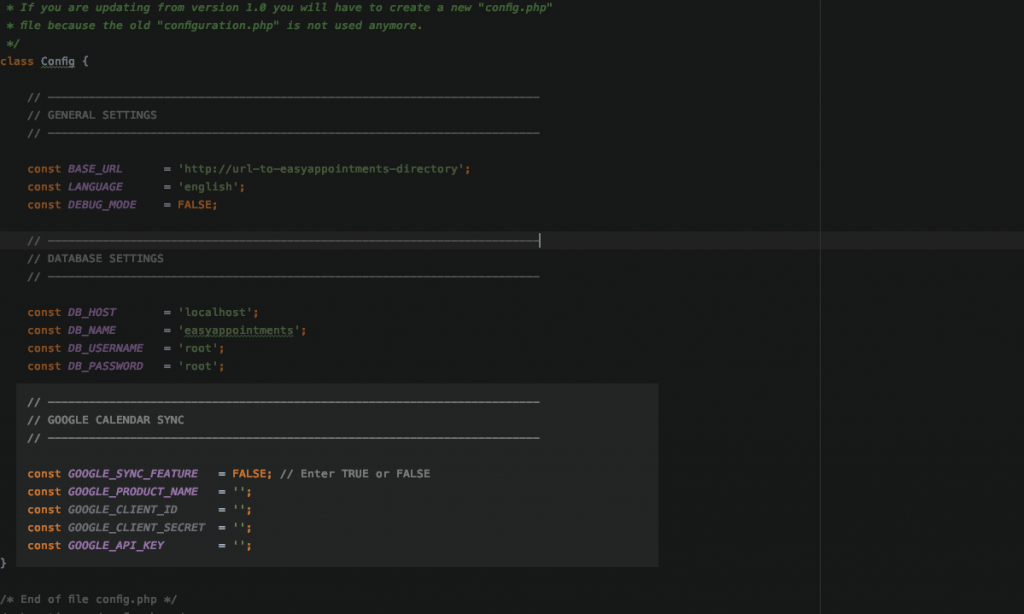
To enable the synchronization edit your root config.php file and update the Google Calendar Sync section with your API credentials.
GOOGLE_SYNC_FEATUREneeds to be set toTRUE.GOOGLE_PRODUCT_NAMEneeds to have the same name as the Google Cloud Console project.GOOGLE_CLIENT_IDneeds the client ID from the OAuth2 credentials.GOOGLE_CLIENT_SECRETneeds the client secret from the OAuth2 credentials.GOOGLE_API_KEYneeds the API key created in the previous section.
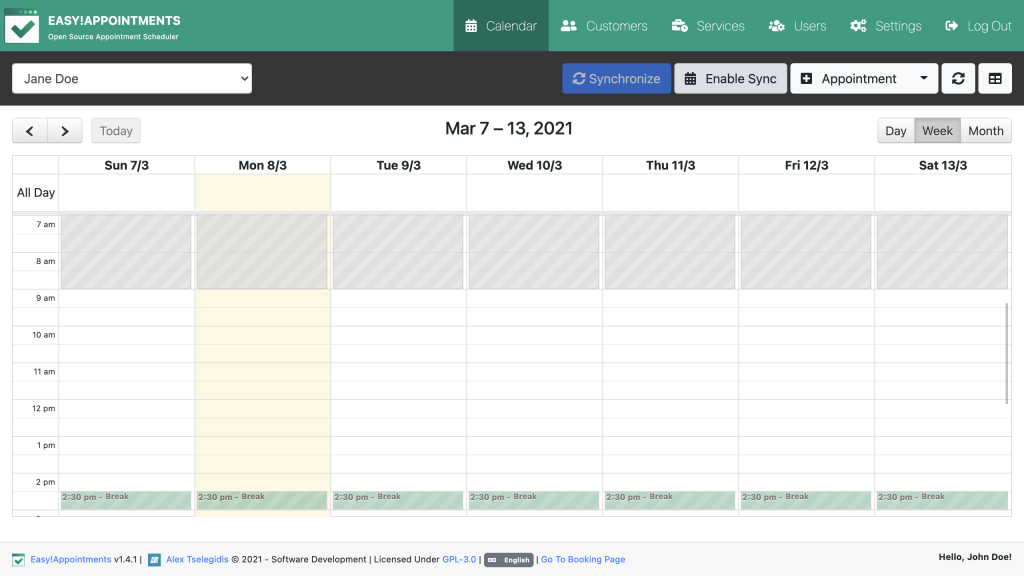
Go to backend/calendar page, select a provider and click on the Enable Sync button. A new window will pop up asking you to grant concern. Enter the user’s credentials and the synchronization will be activated. Any calendar change will be automatically synced with your Google Calendar and clicking the Sync button will fetch Google Calendar changes to Easy!Appointments too.
You can automatically trigger the synchronization by configuring a cronjob on your server. Read the following article for more information on how to do that.